
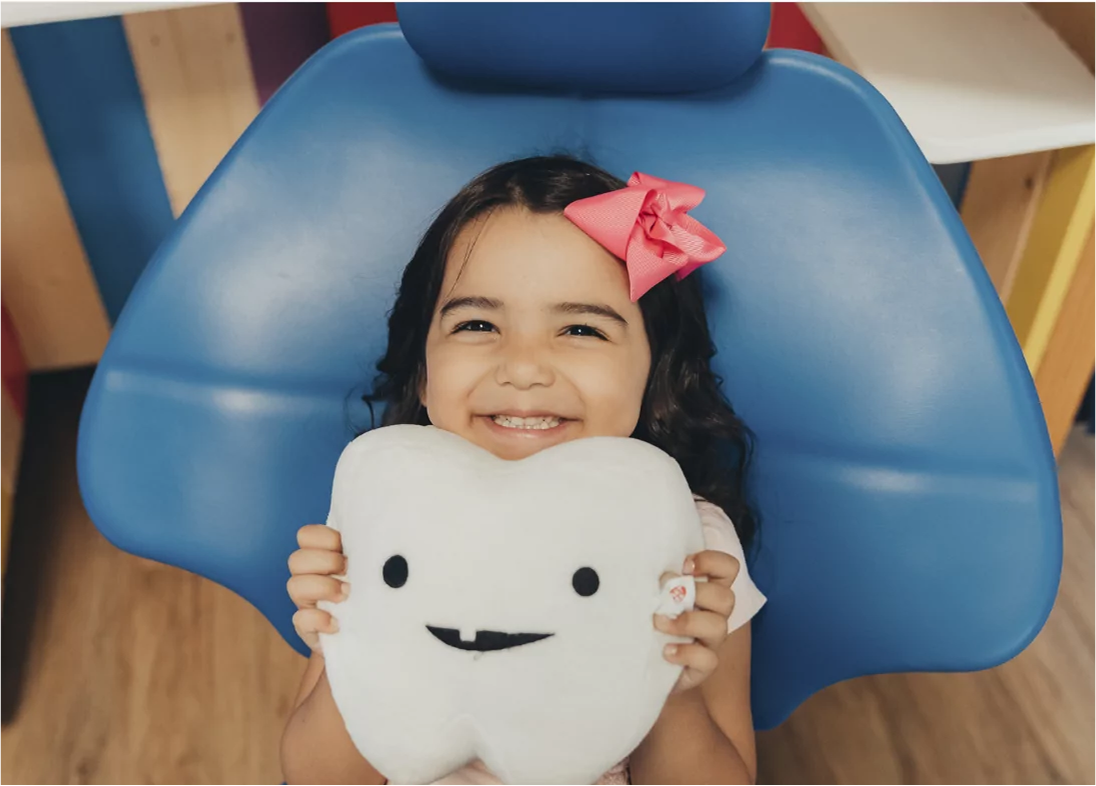
Category: Pre & Post Instructions
Surgical Patient Instruction
![]()
Your child may be instructed to bite on gauze to maintain pressure on the extraction site(s).
1. Activity: Restrict activity for a minimum of two hours post-extraction. Strenuous physical exertion may induce bleeding.
2. Diet: Encourage the consumption of cool, clear liquids and soft foods during the initial 24-hour period. Your child may resume a normal diet after 24 hours.
- Avoid drinking through straws.
- Refrain from vigorous rinsing.
- Do not consume hot soups or liquids.
- Avoid spicy foods.
- Recommended diet: Milkshakes (without straws), plain yogurt, eggs, oatmeal, mashed potatoes, gelatin, pasta, applesauce, etc.
3. Bleeding: Minor oozing and pink-tinged saliva are considered normal. Should bleeding persist, apply pressure with gauze or a moistened tea bag for 30 minutes. If black pellets are present at the extraction site, these are intended to control bleeding and prevent food particles from entering the healing area. They will naturally shrink. Their accidental dislodgement or ingestion is not cause for concern.
4. Pain: Patient responses to treatment vary. Pediatric Tylenol is typically adequate for pain management. For children weighing less than 60 lbs., one to two tablets every four hours is advised. Children exceeding 60 lbs. may be administered adult Tylenol. Aspirin is contraindicated.
5. Oral Care: Normal tooth brushing may be resumed, excluding the immediate extraction area. On the day following the extraction, gentle rinsing with warm salt water (one teaspoon per eight ounces of warm water) may be performed three times daily.
6. Contact our office if any of the following occur:
- Heavy bleeding persists after two hours.
- Severe pain persists after 24 hours.
- Oral temperature exceeds 101°F.
Instrucciones Postoperatorias para Pacientes
Es posible que su hijo deba morder una gasa. Esto se debe a la necesidad de aplicar presión en la(s) zona(s) de extracción.
1. Actividad: Se recomienda controlar la actividad durante al menos dos horas después de las extracciones. El juego vigoroso puede provocar sangrado.
2. Dieta: Durante el primer día, se aconseja el consumo de líquidos fríos y claros, así como de alimentos suaves. Su hijo podrá retomar su dieta normal después de 24 horas.
- NO se debe beber con popote.
- NO se debe enjuagar vigorosamente.
- NO se deben consumir sopas o líquidos calientes.
- NO se deben ingerir alimentos condimentados.
3. Dieta sugerida: Batidos de leche (sin popote), yogur dietético, huevos, avena, puré de papas, gelatina, pasta, puré de manzana, entre otros.
4. Sangrado: Es normal que se presente cierta exudación. La saliva puede adquirir una tonalidad rosada. Si el sangrado persiste, aplique presión con una gasa o una bolsita de té húmeda durante 30 minutos.
Si observa unos rollitos blancos en la zona de extracción, estos tienen la función de controlar el sangrado y evitar la entrada de alimentos mientras la zona cicatriza. Los rollitos se absorberán por sí solos y no causan problemas si se desprenden o se degluten accidentalmente.
5. Dolor: La respuesta al tratamiento varía en cada paciente. Por lo general, el dolor en niños puede controlarse eficazmente con Tylenol. Se recomienda administrar una o dos tabletas cada cuatro horas a niños con un peso inferior a 60 libras. Los niños con un peso superior a 60 libras pueden tomar Tylenol para adultos.
No Se Debe Administrar Aspirina.
6. Cuidado bucal: Se deben cepillar los dientes de forma habitual, exceptuando el área de extracción. Un día después de la extracción, se puede realizar un enjuague suave tres veces al día con agua tibia salada (una cucharadita en ocho onzas de agua tibia).
7. Notifique a nuestro consultorio si ocurre alguna de las siguientes situaciones:
- Sangrado excesivo después de dos horas.
- Dolor intenso después de 24 horas.
- Elevación de la temperatura oral a más de 101 grados Fahrenheit.
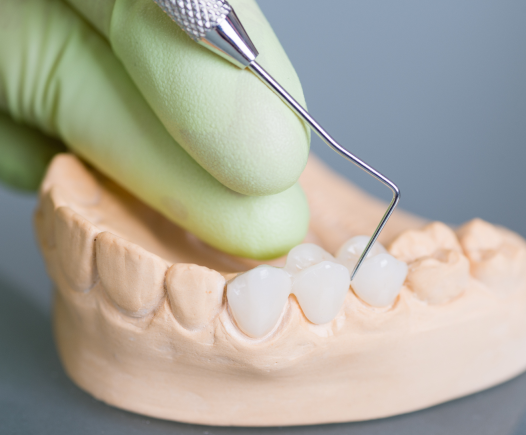
Stainless Steel Crowns
General Information
When dental caries progress significantly, they can compromise the tooth structure to an extent that conventional restorations may not be adequately supported. A stainless steel crown serves to preserve the tooth and mitigate the risk of pain and infection. This restorative option involves a pre-fabricated cap that is meticulously trimmed and adapted to the child’s tooth, encompassing the entire coronal portion at the gingival margin. Stainless steel is a durable material for intraoral use and is designed to remain in site for the duration of the primary (deciduous) tooth’s lifespan, thereby maintaining tooth and root integrity until natural exfoliation.
Stainless steel crowns are indicated in the following circumstances:
- Fractured teeth unsuitable for repair with conventional fillings.
- Severely decayed teeth with insufficient remaining tooth structure.
- Prophylactic measure against fracture in teeth that have undergone a pulpotomy (partial nerve removal).
The Super Dentists can typically place a stainless steel crown in a single appointment. The child’s tooth is prepared to the requisite form, and a stainless steel crown is then precisely trimmed to achieve a secure fit. The crown is subsequently cemented into place. The crowned tooth is expected to exfoliate naturally when the permanent successor is ready to erupt.
Instructions for Home Care
- There are no restrictions on daily activities.
- Immediate resumption of oral hygiene practices, including brushing, is encouraged to promote healing.
- Patients should avoid inter-meal consumption of sugary foods to prevent the development of new carious lesions.
- Hard and sticky foods should be avoided.
Notification Criteria
Please notify our office if any of the following conditions occur:
- Swelling or tenderness of the gingival tissue surrounding the crown.
- The crowned tooth becomes painful or exhibits mobility.
Información General
Si una caries no se detecta a tiempo, puede destruir una parte significativa de la estructura dental, dejando una porción insuficiente para soportar un empaste. La corona de acero inoxidable, en estos casos, preserva el diente y mitiga el riesgo de dolor e infección. Se trata de una corona prefabricada que se ha ajustado y adaptado al diente del niño, cubriéndolo completamente hasta la línea de la encía. El acero inoxidable es un material duradero en el entorno bucal y se mantiene durante toda la vida útil de los dientes primarios del niño, conservando el diente y la raíz intactos hasta la exfoliación natural del diente.
Las coronas de acero inoxidable se emplean en diversas circunstancias:
- En dientes fracturados que no pueden repararse con empastes convencionales.
- En dientes gravemente afectados por caries, donde queda una estructura dental mínima.
- Para prevenir la fractura de un diente al que se le ha realizado una pulpotomía (extirpación parcial del nervio).
La Dra. Keri y su equipo pueden colocar la corona de acero inoxidable en una sola cita. Inicialmente, se prepara el diente de su hijo y posteriormente se ajusta una corona de acero inoxidable para lograr un ajuste firme. A continuación, se aplica cemento a la corona para fijarla en su posición. Generalmente, el diente con la corona se desprende cuando el diente permanente está listo para erupcionar.
Instrucciones para Cuidados en Casa:
- No existen restricciones para las actividades diarias del niño.
- Fomente el cepillado dental de inmediato. Una boca limpia facilitará una curación más rápida.
- El niño debe evitar el consumo de dulces entre comidas para ayudar a prevenir la caries.
- Se deben evitar los alimentos duros y pegajosos.
Por favor, notifíquenos si ocurre alguna de las siguientes situaciones:
- La encía que rodea la corona se inflama o se ablanda.
- El diente con la corona presenta dolor o se afloja.
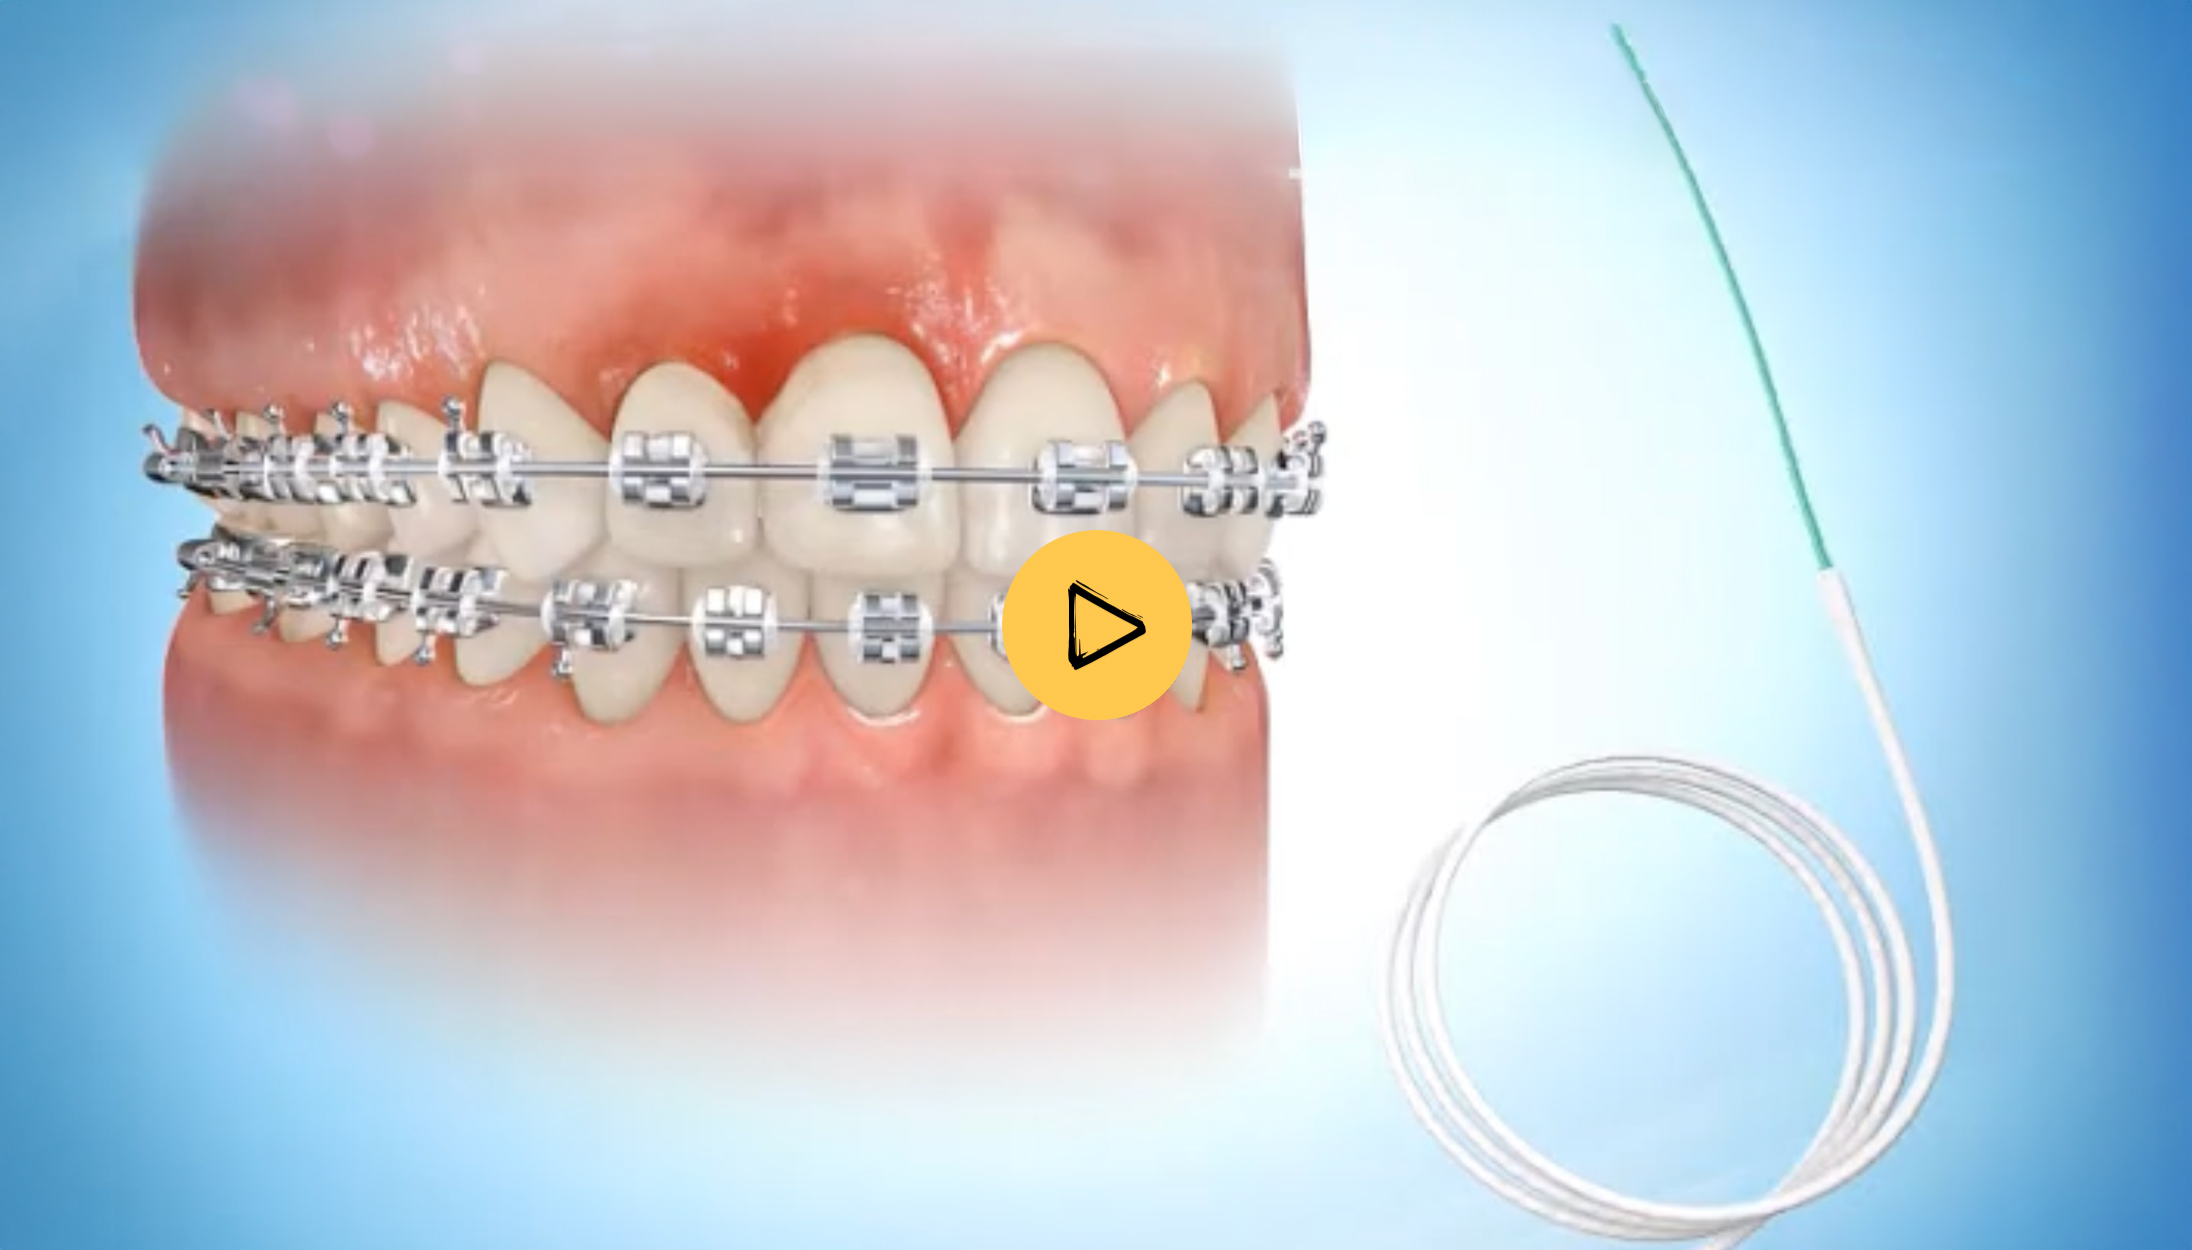
Space Maintainers
In instances of premature primary tooth loss, The Super Dentists may recommend the application of a space maintainer. This orthodontic appliance is designed to preserve the space of the extracted primary tooth until the permanent tooth erupts into its proper position.
Should a primary tooth be lost due to trauma or decay, the surrounding dentition must be stabilized to prevent spatial closure. Prompt application of the space maintainer is crucial, as dental shifting can occur within weeks of the neighboring tooth’s loss. This type of space maintainer is permanently affixed or cemented within the child’s oral cavity.
Home Care Instructions:
- Avoid consumption of hard, sticky foods such as chewing gum and taffy.
- Encourage the consumption of foods that do not exert undue pressure on the appliance’s wires.
- Should a fixed appliance become loose, an immediate appointment is required for recementation.
- Diligent attention to brushing and flossing around the teeth where the spacer is cemented is imperative.
Various types of space maintainers exist, and in some cases, multiple techniques may be explored. Through appropriate treatment and meticulous home care, we can collectively safeguard your child’s dental well-being.
Types of Space Maintainers:
- Unilateral: Designed to maintain space on one side of either the upper or lower jaw.
- Bilateral: Designed to maintain space on opposing sides of either the upper or lower jaw.
- Anterior: Designed to maintain space for the anterior dentition.
Información general
Si un niño pierde un diente temporal a una edad temprana, The Super Dentists puede recomendar un tratamiento con un mantenedor de espacio para preservar el espacio creado. El mantenedor de espacio es un dispositivo diseñado para mantener el espacio dejado por el diente temporal extraído hasta la erupción del diente permanente en su posición correspondiente.
En caso de pérdida de un diente temporal debido a un accidente o caries, es crucial mantener los dientes adyacentes en su lugar para evitar el cierre del espacio. El mantenedor de espacio debe colocarse lo antes posible tras la pérdida del diente, ya que los dientes pueden desplazarse a las pocas semanas de la pérdida de un diente vecino. El mantenedor de espacio se cementa o fija en la boca del niño.
Cuidados en casa:
- Se debe evitar el consumo de alimentos pegajosos, como goma de mascar y caramelos.
- Se recomienda el consumo de alimentos que no ejerzan presión innecesaria sobre los alambres del dispositivo.
- Si el dispositivo fijo se afloja, se debe programar una cita para su recementación inmediata.
- Se debe prestar especial atención al cepillado y uso de hilo dental alrededor de los dientes donde se encuentra colocado el mantenedor de espacio.
Existen diversos tipos de mantenedores de espacio, y en algunos casos se puede explorar más de una técnica. Con el tratamiento adecuado y los cuidados domiciliarios, podemos mantener la salud dental de su hijo.
- Unilaterales: Mantienen el espacio en un solo lado de la mandíbula, ya sea superior o inferior.
- Bilaterales: Mantienen el espacio en lados opuestos de la mandíbula, superior o inferior.
- Anteriores: Mantienen el espacio en los dientes frontales.
Sedation Dentistry
Sedation in dentistry involves the administration of sedatives during dental procedures. This approach is primarily utilized for extensive treatments, particularly when the patient experiences dental phobia or difficulty maintaining stillness. Various types of sedation are available, including:
- Nitrous oxide (“laughing gas”) – administered to induce a state of calm.
- Intravenous (IV) sedation
- Oral sedatives
- General anesthetic – employed to induce a state of unconsciousness.
Sedation may be necessary for patients exhibiting dental phobia, low pain tolerance, or those undergoing significant dental treatment, or with physical handicaps or strong gag reflexes. Procedures such as fillings, crowns, bridges, pulpotomies, extractions, cosmetic procedures, and periodontal treatments frequently necessitate sedation.
The American Dental Association endorses sedation as an effective method for ensuring patient comfort during dental visits. Prior to the use of any sedative or anesthetic, it is
crucial to inform our staff of all medications or medical treatments the patient is currently receiving. Before administering any sedative or anesthetic, a comprehensive explanation of the sedation process, as well as pre- and post-sedation instructions, will be provided.
Before the Dental Appointment:
- Please contact the office if the patient develops an illness, fever, cough, sore throat, or runny nose within two days preceding the dental appointment. A new appointment will be scheduled.
- Oral medication necessitates an empty stomach for optimal absorption and efficacy. Therefore, refrain from providing milk or any solid foods to the patient after midnight the night before their dental appointment.
- The patient must be accompanied by a parent or legal guardian who is required to remain at the office for the entire duration of the dental appointment. Only one parent or legal guardian is permitted in the treatment area, and interruptions during the procedure are strictly prohibited.
-
If siblings are present, they must remain under your constant supervision in the reception area. Please note that siblings are not permitted in the procedure area, and any siblings under the age of 18 must be supervised by a parent or legal guardian in the reception area.
-
If driving, arrange for another adult to accompany you in the vehicle to assist with the return journey. Ensure the patient is secured with a seatbelt and an appropriate car seat.
After the Dental Treatment:
- Although the patient will be conscious following the completion of dental work, drowsiness may occur, potentially leading to a desire to sleep for several hours or for the majority of the day.
- Immediately following the dental treatment, the patient may experience hunger and thirst. At this time, only clear liquids should be consumed.
- The effects of local anesthesia may persist after the dental treatment. Please instruct the patient to avoid biting their lip, tongue, or cheek. Supervise the patient until the local anesthesia dissipates.
- At home, encourage the patient to consume ample liquids and offer soft solid foods such as Jell-O or applesauce. Chewing hard food may inadvertently lead to biting of the lip, tongue, or cheek.
- Supervise the patient’s activities for the remainder of the day. They may exhibit slight unsteadiness and should not be permitted to play outdoors or ascend stairs without close supervision.
- Some patients may experience irritability, nausea, or vomiting. If the patient needs to vomit, allow them to do so without intervention. Do not attempt to prevent the patient from vomiting.
- Should you have any questions or concerns, either prior to or following your visit, please contact our office. We are accessible at all times through our answering service and welcome your call.
La odontología de sedación se refiere al uso de sedantes durante el tratamiento dental. La sedación se utiliza más comúnmente en procedimientos extensos, cuando el paciente experimenta fobia dental o cuando se le dificulta permanecer inmóvil. Existen varios tipos de sedación, que incluyen:
- Óxido nitroso (gas de la risa), empleado para tranquilizar.
- Sedación intravenosa (IV).
- Sedantes orales.
- Anestesia general, utilizada para inducir el sueño en el paciente.
Si su hijo experimenta fobia dental, baja tolerancia al dolor, requiere un tratamiento dental extenso, presenta limitaciones físicas o reflejos marcados a los gases, es posible que necesite sedación. Procedimientos como obturaciones, coronas, puentes, pulpotomías, extracciones, tratamientos cosméticos y periodontales con frecuencia requieren sedación.
La sedación está respaldada por la Asociación Dental Norteamericana (American Dental Association) y constituye una forma efectiva de garantizar la comodidad de su hijo durante las visitas dentales. Antes de administrar cualquier sedante o anestésico, es fundamental informar al personal acerca de la administración de cualquier medicamento o tratamiento médico que su hijo esté recibiendo. Previo a la administración de un sedante o anestésico, se explicará el proceso de sedación y se proporcionarán instrucciones pre y post-sedación.
Antes De La Cita Dental:
- Por favor, comuníquese con el consultorio si su hijo se enferma o presenta fiebre, tos, garganta irritada o catarro dentro de los dos días previos a la cita dental. Se reprogramará una nueva cita.
- El medicamento se administra por vía oral. Por lo tanto, su hijo debe tener el estómago vacío para una mejor absorción y mayor eficacia del medicamento. No administre a su hijo leche ni alimentos sólidos después de la medianoche, antes de su cita dental.
- Su hijo debe estar acompañado por uno de los padres o tutores, quien deberá permanecer en el consultorio durante la totalidad de la cita. Únicamente el padre o tutor puede ingresar a la sala de tratamiento y no debe interrumpir durante el procedimiento.
- Si trae consigo a otros hijos, usted debe supervisarlos en todo momento en el área de recepción. Tenga en cuenta que los hermanos no pueden ingresar al área de tratamiento y que cualquier hermano menor de 18 años debe estar supervisado por uno de los padres o tutores en el área de recepción.
- Si usted conduce, haga los arreglos necesarios para que otra persona adulta le asista en el viaje de regreso a casa. Utilice un cinturón de seguridad y un asiento adecuado para proteger al niño en el automóvil.
DESPUÉS DEL TRATAMIENTO DENTAL:
- Aunque su hijo esté despierto después de finalizado el tratamiento dental, es posible que sienta somnolencia y desee dormir durante varias horas o la mayor parte del día.
- Inmediatamente después del tratamiento dental, su hijo puede tener hambre y sed. En este punto, es posible que su hijo solo pueda ingerir líquidos claros.
- Inmediatamente después del tratamiento, su hijo aún puede sentir el efecto de la anestesia local. Por favor, instruya a su hijo para que no se muerda el labio, la lengua o la mejilla. Observe a su hijo hasta que desaparezca el efecto de la anestesia local.
- En casa, estimule al niño para que ingiera abundantes líquidos y ofrézcale alimentos blandos como gelatina o puré de manzana. Si el niño mastica alimentos duros, puede morderse el labio, la lengua o la mejilla.
- Supervise las actividades de su hijo durante el resto del día. Su hijo puede estar ligeramente inestable y no se le debe permitir jugar fuera de casa o subir escaleras sin supervisión cercana.
- Algunos niños pueden mostrar irritabilidad o presentar náuseas y vómitos. Si su hijo necesita vomitar, permítale hacerlo. No intente evitar que su hijo vomite.
- Si tiene alguna pregunta o inquietud, ya sea antes o después de la consulta, por favor, llame a nuestro consultorio. Estamos a su disposición a través de nuestro servicio de asistencia en todo momento y nos complacerá atender su llamada.
Sealants
Tooth Sealants: Questions and Answers
What are they?
Sealants are plastic coatings that adhere mechanically to the tooth surface.
Where are they placed?
They are applied to the occlusal and buccal/lingual surfaces of primary and permanent teeth.
Do they prevent decay?
Yes, sealants are effective in preventing decay on the surfaces to which they are applied; however, they do not prevent interproximal decay. Therefore, regular brushing and flossing remain essential.
What are they made of and are they Dangerous to your health?
Sealants are composed of materials similar to those used in composite (white) dental fillings and pose no known health risks.
What teeth are sealants usually placed on?
They are typically applied to primary and permanent molars and bicuspids.
When is the best time for a sealant to be placed on a tooth?
The optimal time for sealant placement is shortly after the tooth erupts into the oral cavity.
How are they placed on the teeth?
They are applied to the teeth using a brush.
How long do they last?
Recent studies indicate that sealants typically last between 5 and 8 years. The occlusal surface may experience wear due to masticatory forces, necessitating regular monitoring to ensure their integrity. This assessment is usually conducted during the 6-month recall visit.
Can they be replaced if they are worn off?
Yes, sealants can be replaced if they show signs of wear or loss.
Are there any restrictions on eating?
Yes, patients should avoid chewing on ice or popcorn kernels. Consumption of other foods is permissible immediately after sealant placement.
Do your teeth feel different after sealants have been placed?
For a few days following sealant placement, patients may experience a sensation of biting directly on the sealant. This is a normal and expected sensation.
In addition to your bi-annual dental check-ups, four crucial methods for cavity prevention include:
- Brushing
- Flossing
- Fluorides
- Sealants
¿Que son los selladores dentales? Los selladores dentales son recubrimientos plásticos que se adhieren mecánicamente a la superficie del diente.
¿Donde se aplican? Se aplican en las superficies oclusales y laterales de los dientes temporales y permanentes.
¿Previenen la caries dental? Sí, previenen la caries dental, aunque no en las superficies interdentales. Es fundamental mantener una higiene bucal adecuada mediante el cepillado y el uso de hilo dental.
¿De que estan hechos y son seguros para la salud? Están fabricados con el mismo tipo de material utilizado en las restauraciones dentales de color blanco y son seguros para la salud.
¿En que dientes se suelen utilizar los selladores? Generalmente se utilizan en los molares y premolares, tanto temporales como permanentes.
¿Cual es el momento optimo para aplicar un sellador dental? El momento más adecuado para aplicar un sellador es poco después de la erupción del diente en la cavidad oral.
¿Como se aplican los selladores dentales? Se aplican sobre la superficie de los dientes mediante un proceso de cepillado.
¿Cuanto tiempo duran los selladores dentales? Estudios recientes indican que los selladores dentales tienen una duración de cinco a ocho años. La superficie oclusal puede sufrir desgaste debido a la presión de la mordida, por lo que es necesario realizar revisiones periódicas para asegurar su permanencia. Esto se realiza habitualmente durante la visita de control semestral.
¿Se pueden reemplazar si se desgastan? Sí, es posible reemplazarlos si se desgastan.
¿Existen restricciones alimentarias? Sí, se debe evitar masticar hielo o granos de palomitas de maíz. Se puede ingerir alimentos inmediatamente después de su aplicación.
¿Se experimenta alguna sensacion diferente en los dientes despues de la aplicacion de selladores? Sí, durante varios días después de la aplicación, es normal sentir como si se estuviera mordiendo sobre los selladores (lo cual es cierto). Esta sensación es temporal y normal.
Actualmente, además de la revisión dental semestral, existen cuatro herramientas esenciales para la prevención de la caries dental:
- Cepillado
- Uso de hilo dental
- Fluoruros
- Selladores
Pulpotomy
General Information
A deep cavity in your child’s baby tooth may go into the nerve (pulp) of the tooth. In such cases, a pulpotomy is recommended to save the tooth.
A pulpotomy of a baby tooth is similar to, but not as complex as root canal treatment of an adult tooth. Both procedures prevent unnecessary loss of teeth. Your child’s baby teeth are important in guiding the permanent teeth into position and should therefore remain in your child’s mouth until they are lost naturally.
A pulpotomy removes part of the nerve (pulp) of a tooth to prevent or treat the formation of an abscess. A medicated filling material is placed in the nerve space and a cap or a filling is then used to restore your child’s tooth.
We insist on proper brushing, flossing and avoidance of sweet snacks. Your child should then never again have cavities large enough to require another pulpotomy. To insure this, please be sure you schedule regular checkups every six months.
General Measures
- If local anesthetic was given to your child for the pulpotomy, watch him or her for several hours to make sure he/she is not chewing his/her cheek, tongue or lips, which are numb.
- Brush and floss as usual. A clean mouth heals faster.
- Avoid hard sticky foods that would tend to remove the temporary filling material.
Food and your Appliances
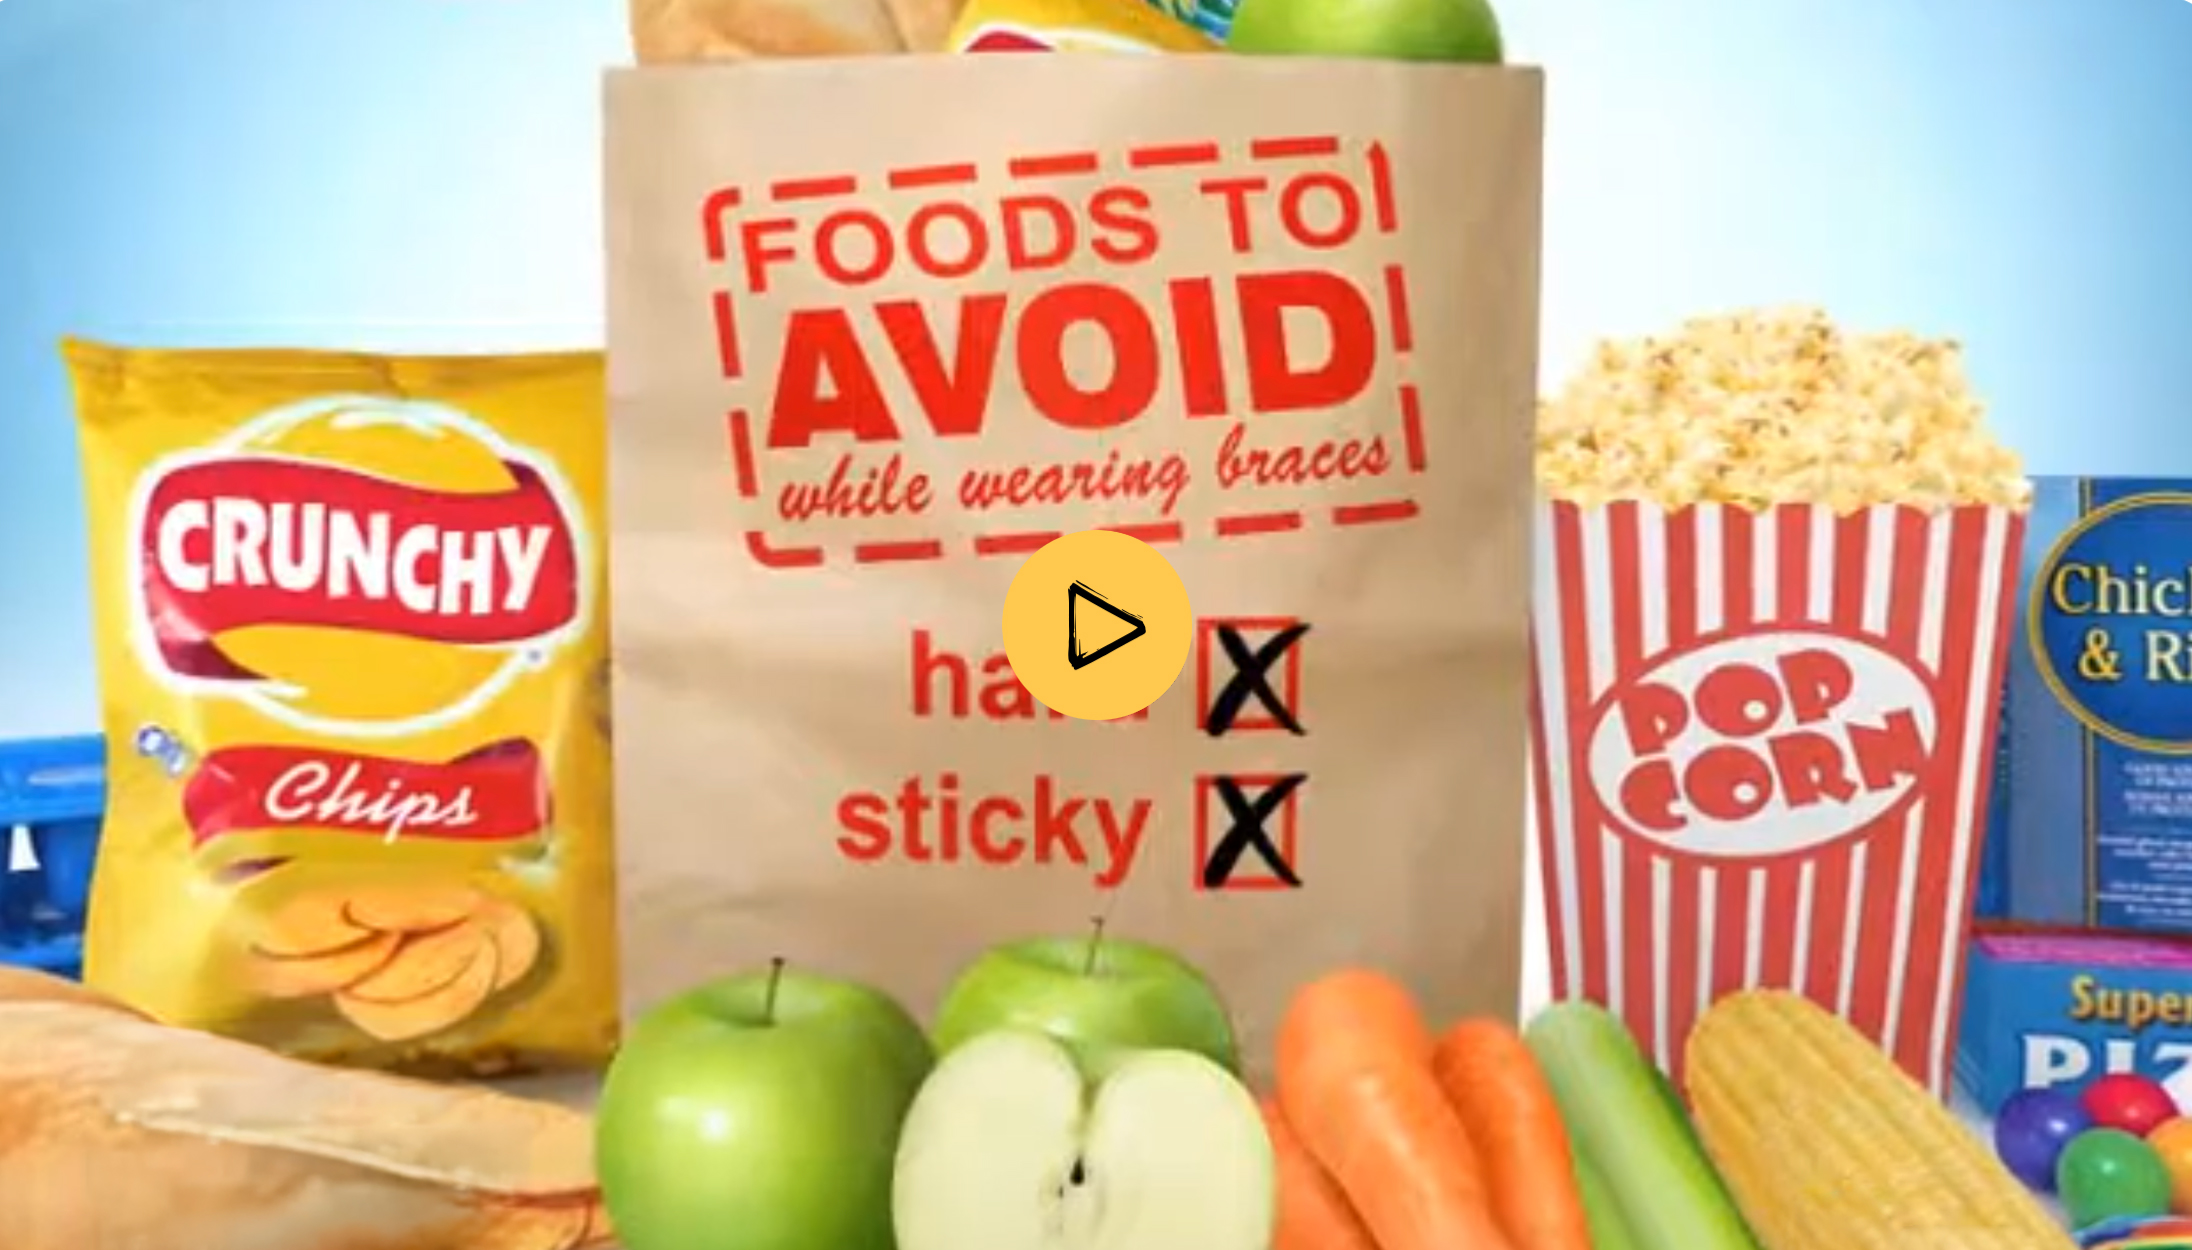
A careful patient can probably eat most foods and not damage their orthodontic appliances — “braces.”
There are three food types that DO cause problems:
- Hard Foods
- Sticky and Chewy Foods
- Food High in Sugar Content
1. Hard Foods cause damage by bending archwires, destroying the cement under the bands and loosen the brackets or tubes attached directly to the teeth. Some of the foods we should be careful about are listed below:
Don’ts
- Ice
- Popcorn
- Corn Nuts
- Pizza Crust
- Rolled Tacos
- Pretzels
- Hard Rolls or Bread Sticks
- Sunflower Seeds
- Peanut Brittle
Do’s
- Pears and Mangos cut in small pieces
- Apples and pears cut in small pieces
- Creamy peanut butter
2. Sticky and Chewy Foods can damage appliances by bending wires, pulling cement loose and detaching direct bonded brackets. Some examples are:
- Taffy
- Sugar Daddies
- Raisins
- Caramel
- Beef Jerky
- Milk Duds
- Licorice
- Milky Way
- Snickers
- Abba Zabbas
- Airheads
- Twix
3. Food High in Sugar Content should be avoided all together. Brush your teeth immediately after sweets.
Please avoid foods high in sugar and minimize the use of carbonated drinks.
Do not chew on pencils or pens!
Los pacientes precavidos probablement comen casi todos los tipos de alimentos y no dañan sus aparatos or-todóncicos (frenos).
Hay tres tipos de alimentos que Causan problemas:
- Alimentos duros.
- Alimentos pegajosos y chiclosos.
- Aliments con un alto contenido de azúcar.
1. Los alimentos duros causan daño porque doblan los arcos de alambre, destruyen el cemento que se encuen- tra debajo de las bandas, y aflojan los soportes o los tubos fijados directamente sobre los dientes. A continu- ación mencionamos algunos de los alimentos con los que debemos tener precaución:
No Comer
- No masticar hielo
- Palomitas de maíz
- Corn Nuts
- El borde de la pizza
- Tacos dorados
- Pretzels
- Pan duro
- Semillas de girasol ó de calabaza
- Dulce chicloso con nueces ó pasas
Comer
- Trozos de zanahoria y trozoz de apio
- Manzanas y peras (cortar en piezas pequeñas)
- Crema de mani
2. Los alimentos pegajosos y chiclosos pueden dañar los aparatos dentales porque doblan los arcos de alam- bre, aflojan el cemento y desprenden los soportes que están fijado directamente. Éstos son algunos ejemplos:
- Taffy
- Sugar Daddy
- Pasas
- Caramelos
- Carne Seca
- Milk Duds
- Licorice
- Milky Way
- Snickers
- Abba Zabbas
- Airheads
- Twix
3. Los alimentos con un alto contenido de azúcar deben evitarse en general. Cepilla tus dientes inmediata-mente después de comer dulces.
Evita los alimentos que tienen un alto contenido de azúcar y minimiza el consumo de bebidas carbonatadas.
¡No muerdas los lapices y plumas!
First Aid for Dental Emergency
Toothache:
Clean the area around the sore tooth thoroughly. Rinse the mouth vigorously with warm salt water or use dental floss to displace any food trapped between teeth. DO NOT place Aspirin or heat on the gum or on the aching tooth. In the event of facial swelling, apply a cold compress or ice wrapped in a cloth. Take acetamino-phen (Tylenol) for pain and see a dentist as soon as possible.
Broken braces and wires:
If a broken appliance can be removed easily, take it out. If it cannot, cover the sharp or protruding portion with wax, cotton balls, gauze or chewing gum. If a wire is stuck in the gums, cheek or tongue, DO NOT remove it. Take your child to a dentist immediately. Loose or broken appliances that do not bother your child don’t usually require emergency attention.
Cut or bitten tongue, lip or cheek:
Ice can be applied to any bruised areas. If there is bleeding, apply firm but gentle pressure with a clean gauze or cloth. If bleeding does not stop after 15 minutes or it cannot be controlled by simple pressure, take your child to a hospital emergency room.
Possible broken jaw:
If a fractured jaw is suspected, try to keep the jaws from moving by using a towel, tie or handkerchief, then take the child to the nearest hospital emergency room.
Bleeding after baby tooth falls out:
Fold and pack a clean gauze or cloth over the bleeding area. Have the child bite on the gauze with pressure for 15 minutes. This may be repeated once; if bleeding persists, see a dentist.
Cold/Canker Sores:
Many children occasionally suffer from “cold” or “canker” sores. Usually over the counter preparations giverelief. Because some serious diseases may begin as sores, it is important to have a dental evaluation if these sores persist.
Knocked out permanent tooth:
Find the tooth. Handle the tooth by the top (crown), not the root portion. You may rinse the tooth gently in cool water, but DO NOT clean or handle the tooth unnecessarily. Try to reinsert it in its socket. Have the child hold the tooth in place by biting on a clean gauze or cloth. If you cannot insert the tooth, transport the tooth in a cup containing milk or water. See a dentist IMMEDIATELY! Time is a critical factor in saving the tooth.
Broken Tooth:
Rinse dirt from the injured area with warm water. Place cold compresses over the face in the area of the injury. Locate and save any broken tooth fragments. Immediate dental attention is necessary.
Emergencies can be prevented
- Encourage your children to wear comfortable, professionally crafted mouth protectors during sports.
- Always use a car seat for young children. Require seatbelts for everyone else in the car.
- Childproof your home. A significant percentage of mouth injuries occur in children under the age of 3.
- Protect children from unnecessary toothaches with regular dental checkups and preventive care.
Filling Template
A “filling” is used to replace and restore your tooth structure when it is damaged due to decay or fractured with a material. The Super Dentists replaces old, broken down metal fillings that contain traces of mercury with white fillings (composites) to restore your smile and teeth to a more natural look and feel.
With today’s advancements, no longer do you or your children have to suffer the embarrassment of unsightly and unhealthy silver/mercury fillings or metal margins of the past. Eliminate the dark, black appearance in your teeth with new age, state-of-the-art, tooth-colored resin or porcelain materials.
Comparing White Fillings with Silver/Mercury Amalgam fillings:
- White fillings bond to your tooth; they strengthen the tooth by restoring most of its original shape. Silver amalgams, on the other hand, weaken the teeth and make them more susceptible to breaking. Broken teeth can be very expensive to replace; white fillings can actually save you time and money in the long run.
- White filling composites are preferred by most patients. This is due to the natural color, strength and overall appearance and feel. Composites are naturally more comfortable.
- Hot and cold sensitivity is greatly reduced with composite material compared to the silver/mercury amalgams.
- Restorations with composites require less removal of your tooth, dramatically smaller holes, less structure to replace than those with silver amalgams (especially with new cavities).
- White fillings are healthier because no traces of mercury are used, unlike silver amalgams.
Las obturaciones se utilizan para reemplazar y restaurar la estructura de sus dientes cuando se ha dañado debido a desomposición, o fracturado con un material. The Super Dentists reemplaza las obturaciones metálicas usadas y rotas que contienen trazas de mercurio, con obturaciones blancas (materiales compuestos) para restablecer su sonrisa y dientes con una apariencia y sensación más naturales.
Con los avances de hoy, su niño ya no tiene que sufrir la pena que causan las obturaciones o márgenes metálicos antiestéticos y poco saludables de plata o mercurio del pasado. Elimine la apariencia oscura o negra en susdientes con la resina o los materiales de porcelana del color de sus dientes de tecnología de punta.
Comparación de las obturaciones blancas con las obturaciones de las amalgamas de plata y mercurio:
- Las obturaciones blancas se fijan en sus dientes; refuerzan los dientes porque restauran la mayor parte de su forma original. Las amalgamas de plata, por el contrario, debilitan los dientes y los hacen más susceptibles a las fracturas. Los dientes fracturados pueden resultar muy caros para remplazarlos; las obturaciones blancas pueden realmente ahorrarle tiempo y dinero en el largo plazo.
- La mayoría de los pacientes prefiere los compuestos de las obturaciones blancas. Esto se debe al color natural, resistencia, y apariencia y sensación general. Los materiales compuestos son naturalmente más cómodos.
- La sensibilidad al calor y al frío se reduce considerablemente con los materiales compuestos en comparación con las amalgamas de plata y mercurio.
- Las restauraciones con materiales compuestos hacen necesaria la remoción de una parte más pequeña del diente, orificios considerablemente menores, y menos estructura que reemplazar que las restauraciones con amalgamas de plata (especialmente en las cavidades nuevas).
- Las obturaciones blancas son más saludables porque no contienen trazas de mercurio, a diferencia de las amalgamas de plata.
Crowns
To ensure the longevity of your child’s dental crowns, it is imperative to adhere to specific dietaryrestrictions.
Permitted Foods:
- Cut all food items into small, manageable pieces.
- Avoid biting with the anterior teeth.
Foods to Avoid:
- Ice
- Popcorn
- Corn Nuts
- Pizza Crust
- Rolled Tacos
- Pretzels
- Hard Rolls or Breadsticks
- Sunflower Seeds
- Peanut Brittle
- Taffy or any type of sticky candy.
Furthermore, consumption of foods high in sugar should be minimized. Promptly brush teeth after consuming any sweet items.
Brushing and Flossing
To foster optimal dental health habits in children, it is advisable to educate them early on regarding proper oral hygiene.
The following are six guidelines for effective tooth brushing:
- Utilize a soft-bristled toothbrush and a small amount of fluoride toothpaste. Replace the toothbrush when the bristles show signs of wear or fraying.
- Employ small circular motions to dislodge food particles that may be present beneath the gum line.
- Position the toothbrush at an angle and brush meticulously, ensuring coverage of all interdental areas and tooth surfaces.
- A thorough brushing session should span several minutes. Brush the lower teeth with an upward motion, the upper teeth with a downward motion, and ensure all external, internal, and chewing surfaces of both anterior and posterior teeth are cleaned.
- Prior to rinsing, brush the tongue and the roof of the mouth.
- Avoid swallowing toothpaste and rinse the mouth thoroughly with water upon completion of brushing.
It is recommended that both children and adults brush their teeth four times daily to prevent the accumulation of food particles and plaque:
- In the morning, following breakfast
- After lunch or immediately after school
- After dinner
- At bedtime
Flossing
It is recognized that toothbrushes cannot access all areas between teeth. Therefore, the use of dental floss is crucial for removing food particles and plaque that toothbrushes cannot reach. Dental floss, a thin strand of waxed nylon designed to clean below the gum line and between teeth, should be used daily.
The following are five instructions for teaching children how to floss:
- Dispense a sufficient length of floss.
- Securely wrap the ends of the floss around the middle fingers.
- Guide the floss between all teeth to the gum line, removing any food particles or plaque.
- Unwind clean floss from the fingers progressively, ensuring that the entire length of floss is utilized.
- Floss behind all posterior teeth.
It is imperative to floss at night to ensure optimal tooth cleanliness prior to sleep.
When children first begin flossing, it should be explained to them that minor gum bleeding may occur.
Cepillado
Para fomentar buenos hábitos de salud dental en sus hijos, enséñeles, desde temprana edad, la importancia de una higiene bucal óptima. A continuación, se presentan siete consejos para el cepillado dental:
- Utilice un cepillo dental de cerdas suaves y una pequeña cantidad de pasta dental con fluoruro. Una vez que las cerdas muestren signos de desgaste, reemplace el cepillo por uno nuevo.
- Realice movimientos circulares pequeños con el cepillo para remover las partículas de alimentos que puedan encontrarse debajo del borde de las encías.
- Sostenga el cepillo formando un ángulo con los dientes y cepille lenta y cuidadosamente, cubriendo todas las áreas interdentales y la superficie de cada diente.
- Dedique varios minutos a cepillar minuciosamente sus dientes. Cepille hacia arriba los dientes inferiores, hacia abajo los superiores, y no olvide las superficies externas, internas y de masticación de todos sus dientes, tanto frontales como posteriores.
- Cepille su lengua y el paladar antes de enjuagarse.
- Evite la ingestión de la pasta dental y enjuague su boca abundantemente con agua al finalizar el cepillado.
Sus hijos (y usted) deben cepillar sus dientes cuatro veces al día para evitar la acumulación de partículas de
alimentos y sarro:
- Por la mañana, después del desayuno.
- Después del almuerzo o después de clases.
- Después de cenar.
- Antes de acostarse.
Uso del hilo dental
Es bien sabido que existen áreas entre los dientes a las que el cepillo dental no puede llegar. Por esta razón, es fundamental el uso del hilo dental, ya que este extrae partículas de alimento y sarro que el cepillo no puede. Diariamente se debe utilizar un hilo delgado de nylon encerado para alcanzar la parte inferior de la encía y limpiar entre los dientes.
A continuación, se presentan cinco consejos para enseñar a sus hijos a usar el hilo dental:
- Tome un segmento corto de hilo del dispensador.
- Enrolle firmemente los extremos del hilo en sus dedos medios.
- Pase el hilo entre todos sus dientes hasta el borde de la encía, y extraiga las partículas de alimentos o el sarro que pueda haber.
- Desenrolle el hilo de sus dedos a medida que avanza, de modo que haya utilizado todo el hilo de principio a fin al concluir.
- Pase el hilo dental entre todos los dientes posteriores.
¡No olvide! Use el hilo por la noche para asegurarse de que estén relucientes de limpios antes de irse a dormir.
Cuando sus hijos comiencen a usar el hilo dental, explíqueles que las encías pueden sangrar levemente.
Anesthetic Instructions
Post-Anesthetic Patient Instructions:
- Your child has received a local anesthetic. In addition to blocking sensation from the teeth, the anesthetic will numb the lips, cheeks, and tongue in the treated area. This may be an unusual sensation for a child, but care must be taken to prevent your child from biting, sucking, or chewing their lips or tongue, as this could result in tissue lacerations. While not serious, these can be quite uncomfortable.
- Therefore, please supervise your child closely for approximately two hours and ensure they avoid consuming solid foods until the anesthetic has dissipated.
After Dental Treatment:
- Although your child will be awake after dental treatment, they may experience drowsiness and may wish to sleep for several hours or for the remainder of the day.
- Immediately following dental treatment, your child may experience hunger and thirst. At this time, your child should consume only clear liquids.
- At home, encourage your child to drink ample liquids and provide a soft/liquid diet such as Jell-O, applesauce, or lukewarm soup. Chewing hard foods may lead to your child biting their lips, tongue, or cheek.
- Supervise your child’s activities for the rest of the day. They may be slightly unsteady and should not be permitted to play outdoors or climb stairs without close supervision.
- Some children may exhibit irritability or experience nausea and vomiting. If your child needs to vomit, allow them to do so without intervention.
- Should you have any questions or concerns, either before or after your visit, please contact our office.
- We are accessible through our answering service at all times and welcome your call.
Instrucciones Post-Anestésicas para el paciente:
- Su hijo(a) ha recibido anestesia local. Esto provoca un bloqueo de la sensación en los dientes, y el anestésico adormece los labios, mejillas y lengua en el área tratada. Esta sensación puede resultar extraña para su hijo(a); por lo tanto, es crucial evitar que se muerda, chupe o mastique los labios o la lengua, ya que esto podría causar laceraciones en el tejido cutáneo. Aunque no son graves, estas lesiones pueden ser incómodas.
- Por esta razón, por favor supervise a su hijo(a) de cerca durante aproximadamente dos horas y evite la ingesta de alimentos sólidos hasta que el efecto de la anestesia haya desaparecido por completo.
Después del Tratamiento Dental:
- Aunque su hijo(a) estará despierto(a) una vez finalizado el tratamiento, es posible que experimente somnolencia y desee dormir durante unas horas o el resto del día.
- Inmediatamente después del tratamiento dental, su hijo(a) podría sentir sed y hambre. En este momento, solo se permite la ingesta de líquidos claros.
- En casa, anime a su hijo(a) a beber abundantes líquidos y a consumir una dieta de alimentos blandos y líquidos como gelatina, puré de manzana o sopa tibia. Masticar alimentos duros podría llevar a que se muerda los labios, la lengua o las mejillas.
- Supervise las actividades de su hijo(a) durante el resto del día. Es posible que esté algo inestable y no debería jugar al aire libre ni subir escaleras sin supervisión estricta.
- Algunos niños pueden volverse irritables o experimentar náuseas y vómitos. Si su hijo(a) necesita vomitar, no intente impedirlo; permita que lo haga.
- Si tiene alguna pregunta o inquietud, ya sea antes o después de su cita, por favor llame a nuestro consultorio.
- Nuestro servicio de emergencias está disponible en todo momento para atender sus llamadas.
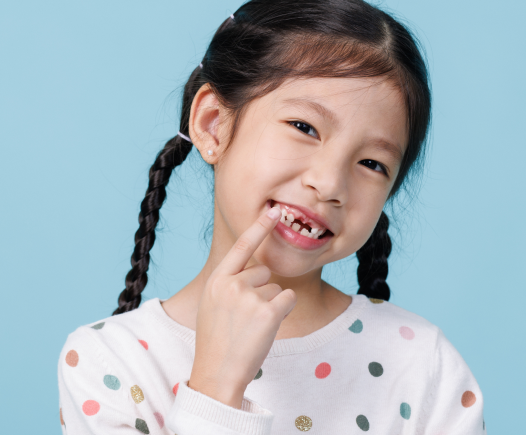
Age 1 to 3 Years Old- Dental Health
What is the most important dental fact about this age group?
Recent studies indicate that there is a “window” period from about 18 to 26 months of age when children are most likely to get the bacterium that causes tooth decay. The most common source is the saliva of themother or another caregiver.
How can I use this information to protect my toddler?
Use this 6 point program:
1. If your toddler has not yet given up the bottle, be sure that it contains only water at naps and bedtime. When the child is sleeping, the saliva does not wash over the teeth to give protection from decay acid.
2. Keep your own teeth decay free with good dental care and regular brushing and flossing to minimize the concentration of the decay bacterium in your saliva.
3. Brush your toddler’s teeth twice a day in a thorough way.
4. Avoid fruit juice.
5. See your pediatric dentist for a first exam about one year of age, and for checkups on the schedule that the pediatric dentist prescribes.
6. Be aware of the fluoride content of the water that your child drinks. If it is below the 0.6 mg/L, consider fluoridated bottle water or a fluoride supplement.
What about breast feeding and decay?
Breast milk contains lactose so it can cause decay when children nurse during the night. Children who have erupted their teeth early and who nurse for many short periods or stay attached to the mother while they sleep are particularly at risk. If you are still nursing after your baby’s teeth erupt, use these suggestions:
1. Try to reduce the amount of night nursing because this is when the decay occurs.
2. Keep your toddler’s teeth very clean.
3. Ask your pediatric dentist if there are any white spots or lines that signal beginning decay. If no signs are present, ask for a ninety day checkup interval while you are still nursing at night and don’t worry. If decay is starting, you may want to consider weaning.
What is the best way to brush my toddler’s teeth?
1. Use a dry toothbrush. Don’t even wet the toothbrush with water.
2. Don’t use toothpaste until 3 years old. After 3, brush with a dry brush first, then add a half pea sized squib of paste.
3. Put the child’s head in your lap for comfort, security and good vision.
4. Use a small soft toothbrush with the bristles placed squarely against the teeth at gumline. Use just enough pressure to cause a slight whitening of the gums. Jiggle the brush in a circular direction. Follow the same path around the mouth each time to cover all the outside, inside and chewing surfaces.
5. It should take 1 to 1 1/2 minutes to brush a toddler’s teeth.
What if my toddler won’t let me brush?
We would rather insist on brushing than insist on fillings. Many toddlers resist. That’s part of the joy of parenting. Sit down on the floor, put the toddler’s head in your lap, and brush. For particularly athletic offspring this may be a two parent activity for a while, but don’t give up!
What about fluoride supplements?
The fluoride levels in the water vary widely. Your pediatrician and your pediatric dentist will tell you if your toddler needs extra fluoride. You must be sure to tell the doctors if your child is substituting bottled water or if you are putting your tap water through a reverse osmosis (RO) filter.
If my toddler is off the bottle, is a dental exam still necessary?
Probably no decay will be found. The visit is still worthwhile to evaluate and improve your preventive program. Sometimes very small openings are found in apparently healthy teeth, then sealants or temporary fillings can prevent decay problems.
How can the pediatric dentist work with a toddler?
When children are 30 months or younger we usually do their exams in the parent’s lap. We sit in a knee-to-knee position so that the child can be leaned back onto the dentist’s knees. This keeps the child connected to the parent for reassurance. Minor restorative procedures can also be done in this way.
What if a child under 3 years of age needs a lot of dental?
It is often surprising how much cooperation we can get from very young children. But when the amount of work to be done is beyond a child’s ability to cooperate, we have the qualifications and staff privileges to provide sedation, or general anesthesia by a board certified anesthesiologist.
What about thumbsucking and pacifiers?
There is not much we can do about thumbsucking before three years old that is both effective and kind. So we suggest just a low key effort to minimize the time spent sucking. Since the pacifier is not attached to the child, we can exert a little more control. After infancy, use the pacifier only for sleep and real distress. Don’t automatically bring it to the store, to church, to the doctor. When the child can communicate, don’t volunteer the pacifier at night until the child asks for it.
When my child bumps a tooth, how do I know if the dentist should look at it?
If a tooth is loose, moved out of its usual position, or is broken so that the nerve may be exposed, the pediatric dentist should examine the child. Unlike permanent teeth, we do not reimplant baby teeth that are totally knocked out.
Tooth Extraction Post-Op Care
Temporary Crown Care
IV Sedation Post-Op Instructions

Post-Op Patient Care Instructions
Anesthesia Pre-Surgery Instructions
Anesthesia Pre-Surgery Instructions
Anesthesia may be needed for fillings, crowns, extractions, pulpotomies or other treatments. We encourage you to click through to read more about the procedure your child is having. Our treatment coordinator will also go over your child’s treatment plan, and we encourage you to ask questions if you don’t understand something. If you or your child has upcoming dental surgery, just knowing what to expect can help ease any anxiety.
Please read through our recommendations; if you have any questions, don’t hesitate to email us when we’re confirming your treatment or text us at 619-DENTIST (619-336-8478).
MEDICATIONS
- Continue most medications prescribed by your physician or dentist (see below).
- Give Tylenol for discomfort as necessary.
- Motrin (Ibuprofen) can cause nausea on an empty stomach
- If your child is congested, please give an over the counter decongestant or antihistamine as needed (Including morning of the procedure)
- If your child has ever needed an inhaler or nebulizer for breathing (albuterol), please give a breathing treatment the night before and the morning of the procedure!
DIET
- Please follow eating and drinking guidelines strictly. Your child can be canceled for eating or drinking too close to his/her procedure time!
- Absolutely NO SOLID FOODS OR ANY MILK PRODUCTS from midnight the night before his/her scheduled check-in.
- Absolutely NO LIQUIDS within 3 hours of his/her scheduled check-in.
- Please give ONLY clear liquids, 3 to 6 hours before his/her scheduled check-in. (clear liquids include clear jello, popsicles, apple juice, water, and ice)
- If your child needs to take food with their pills before surgery, you may give them whole or crushed pills in 1 tablespoon of CLEAR JELLY (like grape jelly…NO jam or preserves or applesauce)
FOR CHILDREN WITH SPECIAL NEEDS
- If your child has special needs such as Autism, Developmental Delay, ADHD, Seizures, or Severe Asthma requiring frequent, recent, or regular inhaler use, we prefer to speak directly with you about your child’s needs before his/her planned procedure. Please notify us to schedule a telephone consultation as soon as possible
IN GENERAL:
- All breathing medications such as Singular, Albuterol, Flonase or inhaled steroids should be GIVEN up to and including the MORNING OF SURGERY.
- All Autism Medications should be GIVEN up to and including MORNING OF SURGERY.
- All ADHD Medications should be HELD MORNING OF SURGERY.
- ALL Seizure Medications should be GIVEN MORNING OF SURGERY.
- ALL other behavior medications (anxiety, depression, OCD, etc.) should be GIVEN on schedule.
- If your child has extreme anxiety or has had issues during previous visits, please schedule a pre-op phone consultation, so a plan can be discussed ahead of time.
CONTACT US
Notify our office if any of the following occurs:
- Temperature is greater than 100.5 F within 48 hours of surgery.
- Persistent vomiting; more than two times within 24 hours of surgery.
- Any unusual symptoms or problems that concern you.
Don’t miss important messages from The Super Dentists!
Please add our phone number to your contacts, that way you’ll know it’s us calling about your SUPER kid! We look forward to seeing your family soon!